
It is possible to grow an orchid without roots. This is the method you should follow to revive it and make it bloom again. Under no circumstances should you throw it away.
The orchid is a plant that does not require much care and can therefore be found in many households as an ornamental plant. However, some care must be taken, otherwise our orchid will die and it will not be easy to recover it. Therefore, follow the little secrets required for a healthy and flowering orchid.
First of all, location, temperature and sunlight are very important. For this reason, it is advisable to place the orchid in a place in the house where there are no draughts and where there are no radiators. We then recommend a temperature of approx. 20°C and finally light that is not directly exposed to the sun.
Then watering is also very important, the plant must always be moist, not dry and not full of water. If these small steps are not followed, the plant could suffer consequences: Flowers fall, leaves turn yellow and rotten roots that have to be cut off irreparably . Let’s look at the last case, namely growing an orchid without roots.
What to do if you have an orchid without roots
If you have an orchid with rotten roots, it is better to cut them off than to leave them there. For this reason, the first thing we should do is remove the orchid from the pot and cut off all the rotten roots with scissors. If you need to delete them all, don’t worry and do it. In fact, there is a way to regrow completely healthy roots, and now we will see them.
Once you have completely cut off the roots, remove the branches as well and carefully cut off the base where the roots attach. At this point, you can add some turmeric or cinnamon to disinfect the area and prevent mold growth.
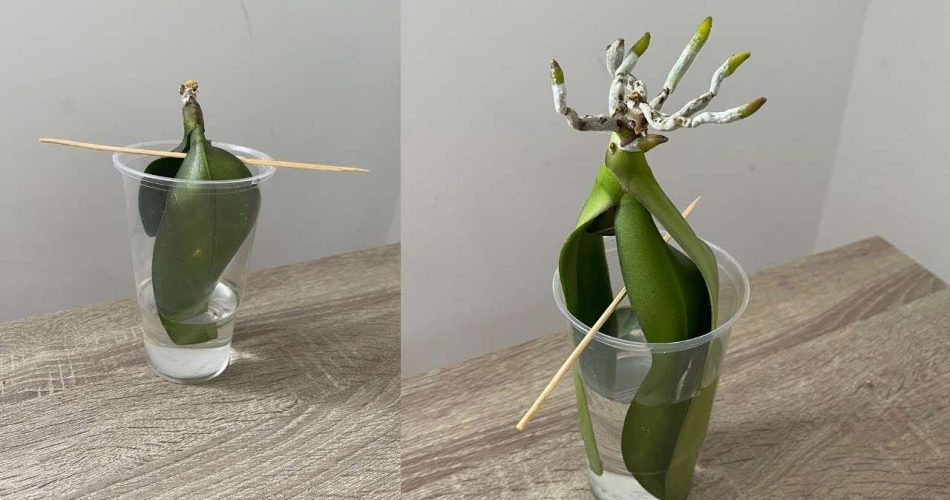
In addition, you carry out the procedure in comparison to what is normally done. Normally the roots are poured into the water, but this time we pour the leaves into the water. It is enough to take a glass that is absolutely transparent, as the light must penetrate, and place the leaves in it with about 4 to 5 centimeters of water. To prevent the root from falling off, just use a toothpick.
At this point, all you have to do is wait. In the first 15 days you will see very small bumps, which means that the method is working. After 3 to 4 months, you will see roots that are a few centimeters long. Always remember to add water when you have finished the jar.
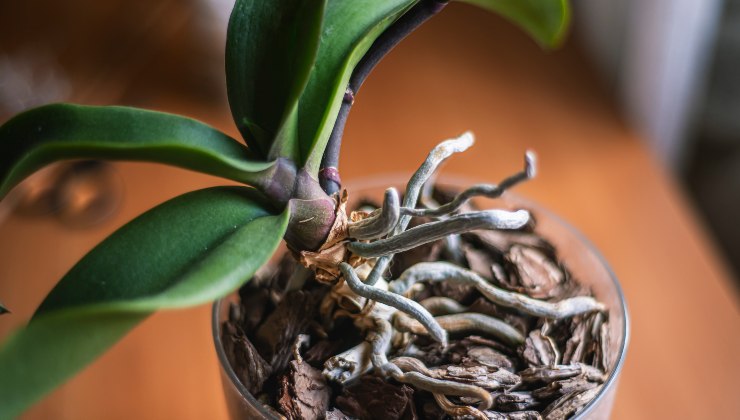
When the roots reach a length of about 6 centimeters, it is time to transplant the orchid. As this orchid finds it difficult to hold on to the soil, we use more products for planting: Clay balls, pine bark and moss to accelerate root formation.
We always take a plastic cup and make incisions in the soil as if it were a vase. We put the clay balls on the bottom to facilitate drainage and then cut off the pine and moss. At this point we sprayed the moss liberally with a spray and added the orchid. Finally, add more pine bark. Here is your orchid reborn.